Progressive & Minimally Invasive Anterior Alignment Orthodontics
Treatment carried out by Rikke Vestmann Jakobsen
Rikke Vestmann Jakobsen from Tandlægerne in Ans dental practice in Denmark, shares a case using the ClearSmile Inman Aligner…
For anterior crowding or protrusion, the ClearSmile Inman Aligner is a great solution for predictable, safe and effective alignment in simple to moderate cases. With this appliance, it’s possible to create the most minimally invasive care and patient-centred treatment. The appliance is a fabulous tool in the preventative toolbox. Straightening teeth is more than cosmetic dentistry – it’s just as much about function and re-establishing or creating a healthy dental foundation.
Since joining the dental profession 12 years ago, I have come to recognise an increasing need for more knowledge about the bite-functional aspect. When I had my own teeth straightened with the ClearSmile Inman Aligner, I finally found a solid base to work and learn from. The IAS Academy provides massive support for all cases through the IAS online forum and therefore it offers extensive, on-going learning.
Patient perspective
Very often, patients do not see anything but the crowding of their teeth and they can have very high hopes for the speed of the treatment. Therefore, a good, honest conversation is mandatory to avoid misunderstandings and disappointment.
Case presentation
A healthy, female, 21-year-old patient presented, with concerns about the upper anterior crowding (she wasn’t worried about the colour or shape of the teeth). While she did not feel a need for correction of lower teeth, it was explained that to achieve sufficient function and compensate for the increased horizontal dimension overjet (HDO), the lower anterior teeth would require straightening as well – to which she agreed.
| Measurement | Result |
|---|---|
| Skeletal | Class I |
| FMPA | Average |
| Lower Face Height | Average |
| Facial Asymmetry | Average |
| Soft Tissues | Initial slight gingivitis, treated with scaling and improved oral health routine |
| Overjet | 1+(1mm) 2+(4.5mm) |
| Overbite | 3mm |
| Displacement on Closure | No |
| Incisor Relationship | Class I |
| Canine Relationship | Class I |
| Molar Relationship | Class 3 (Right side neutral. Left side 1/4 mesial) |
| Teeth Present | 7654321 | 1234567 | 7654321 | 1234567 | 8+8/8-8 present, but not erupted |
| Centrelines | Deviation left side 1.5mm |
In the very first appointment, the patient was informed about her clinical situation and how we might be able to help, as well as what results could be expected. An apical X-ray was taken of the teeth that required alignment, confirming that no root-discrepancies were present. The patient was given a full written consent form, which we discussed during the appointment and the patient was encouraged to read through before the next visit. As always, the patient was encouraged to seek orthodontist specialist advice – in many cases, I will not treat patients unless they have had a second opinion from an orthodontist.
With patient consent to proceed, a second appointment was made for a full clinical assessment, silicone-impressions, a complete set of clinical photographs and an OPG. During the second stage, the case assessment, photographs and treatment were posted and examined on the IAS online forum. It is an invaluable service to be able to request advice from highly experienced dentists and specialists, who check the case for potential errors and share their recommendations – this provides me with a lot more confidence.
Problem list:
- Mild upper and lower anterior crowding. Space calculation indicated 0.7mm of space required in the maxillary and 1mm in the mandibular
- Proclined upper right lateral
- Retroclined upper central and lower laterals
- Mesially rotated centrals
- Spacing distal to canines
- Scissors bite 2. Premolar left side
- Mesial rotation left lower canine
- Deviated lower centreline
- Low gum line
Treatment aims – ideal
- FFA with alignment of 1. molar left side and 2. premolar left side
- Retraction of upper facial segment to close space distal to canines and optimise overjet
- Correct centre line
- Composite edge bonding on upper and lower teeth for stability and long-term retention
- Fixed retention for life, both upper and lower jaw
Treatment aims – compromised:
- Alignment of the upper and lower incisors using removable appliances
- Upper canines to remain slightly distally placed due to limitations of the appliance, but acceptance by the patient
- Acceptance of persisting scissors bite 2. premolar left side
- Improvement of HDO
- Composite edge bonding on upper and lower teeth for stability and long-term retention
- Finishing treatment with fixed wire retention in both the upper and lower arch, from canine to canine
Treatment
Since the main movement was simple tipping and sufficient interproximal reduction (IPR) was performed in the first appointment, this case proceeded quickly and smoothly.
| Appointment | Result |
|---|---|
| Initial | A standard ClearSmile Inman Aligner fitted – patient instructed to wear for 20 hours a day (removing for eating and drinking) and motivated to maintain good oral health IPR performed using 0.10mm strips at each contact point, from canine to canine. While IPR can be performed over two or more sessions, this case required only mild rotation a small amount of space creation Composite anchors were placed palatally on the centrals to encourage labial movement |
| Two weeks into treatment | Centrals had proclined to desired position and were compared to the pre-made acrylic set-up Labial composite anchor was placed on the upper left lateral to achieve retraction and de-rotation |
| Six weeks into treatment | Composite anchors removed and Essix retainer provided to wear until lower alignment was complete Same procedure as above followed for lower arch – IPR performed on each contact point using 0.10mm strips on 2, 1-1, 2 and 0.12mm stripping on the distal aspects of the canines. A standard ClearSmile Inman Aligner with acrylic cover was worn for four weeks – the cover was required to allow the proclination of the laterals and retroclination of the centrals, with no interfaces with the upper teeth |
| Eight weeks into treatment | Occlusal photo taken, everything proceeding according to plan |
| Ten weeks into treatment | Patient satisfied with result and wished to finish treatment While the final result was acceptable, I would very much have liked the patient to use the lower aligner for just one or two more weeks |
The upper incisors and laterals were treated first, followed by lower alignment while the patient wore a temporary Essix retainer on the uppers. Finally, a wire retainer was fixed on both the uppers and lowers and patient was instructed to sleep with an upper Essix retainer for 6 months, to achieve stability. As the wire retainer is most likely to de-bond during this time, wearing of the Essix retainer at night would help to hold the teeth in position should the wire become loose. The patient was offered an Essix retainer on the lower arch for the same reason, but she declined.
From the beginning, the patient wanted as little as possible done and initially chose not to have composite incisal edge bonding after alignment. She was warned about lack of guidance and stability, but with a patient-centred approach, she could take informed responsibility for her own health. However, returning after the wire retainer was fixed, she asked if we could perform the bonding anyway. This was done on the lower centrals and laterals, then to include the upper canines and premolars on each side, using The Dahl Technique. By separating the buccal segments by less than 1mm, it was possible to create slightly more space for the retainer. By the first post-treatment control three months later, the buccal segment had fully settled and the patient reported no trouble or discomfort.
The upper centrals were bonded last. At the time, the patient did not want any composite on the upper right lateral, even though it would have created a more symmetric outcome. Again, she changed her mind on this almost a year later, when we bonded the upper right lateral. The final photographs (Figures 7 & 8) is therefore also a one year follow-up and I’m happy to say that not only did the correction and composite edge bonding improve the appearance, but also function and guidance, and provided better long-term occlusal stability (RM Littles 40 year study on relapse).
Case reflection
As healthcare professionals, we see patients regularly and therefore we have the indisputable advantage of being able to review and check our work, monitoring retainers and composites. By implementing routines that include this, we can help to secure a more stable result with less wear in the future.
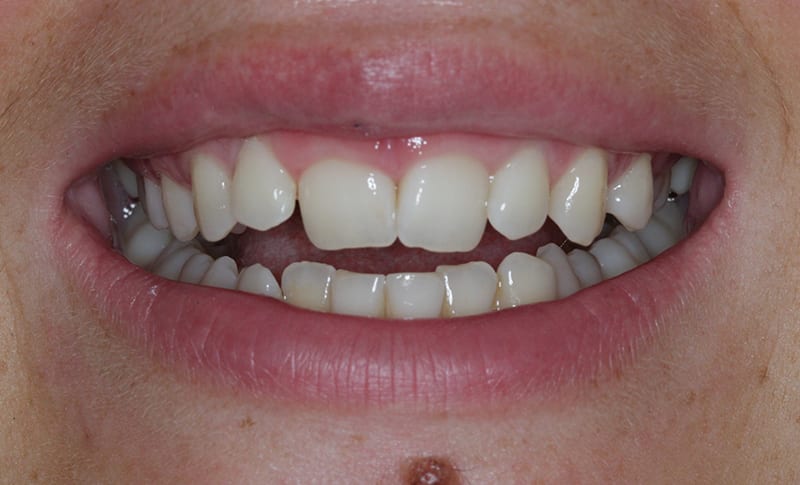 Pre treatment anterior view
 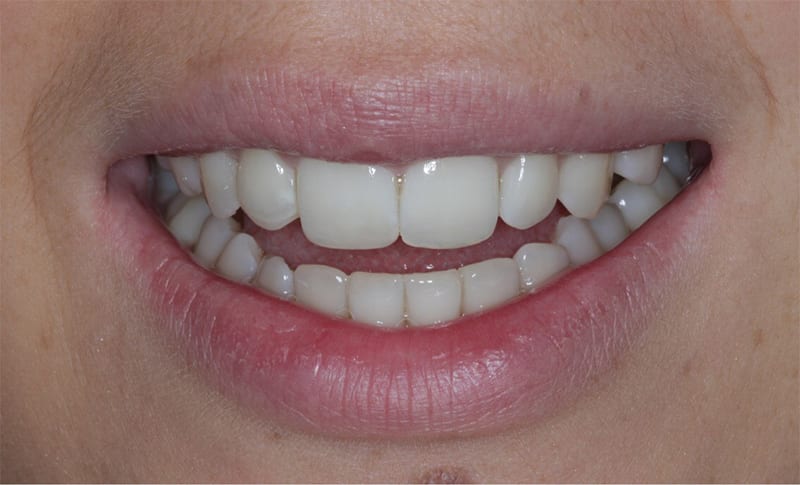 Post aligner treatment and bonding
 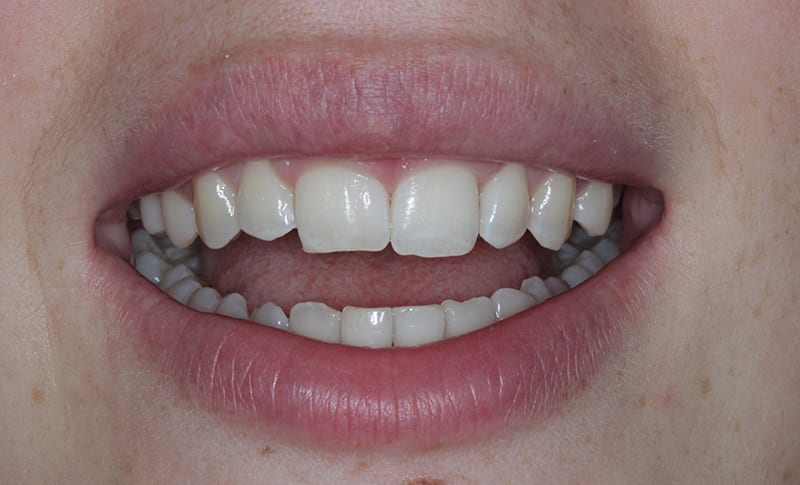 Post alignment front view
 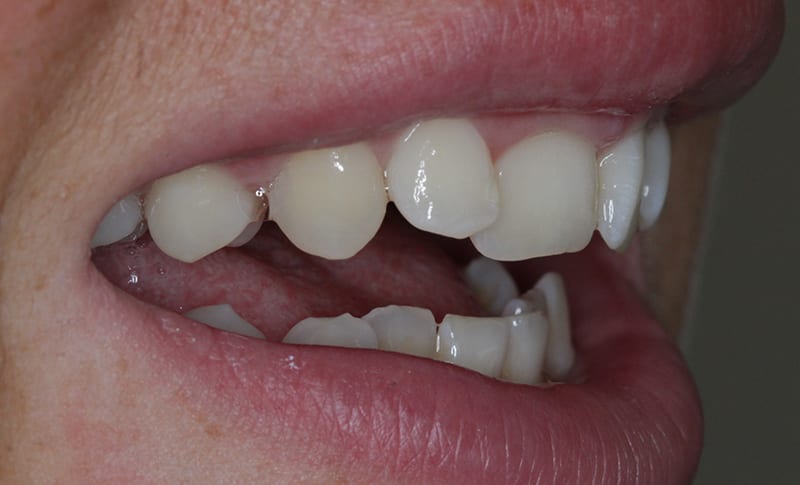 Pre treatment side view
 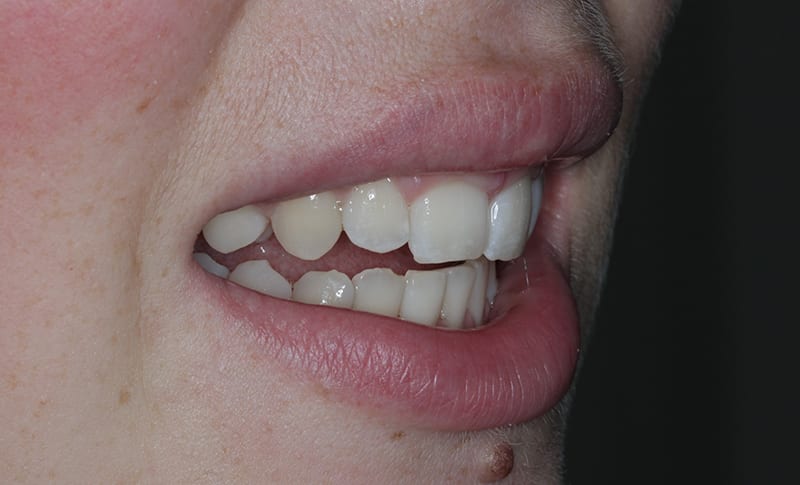 Pre alignment side view
 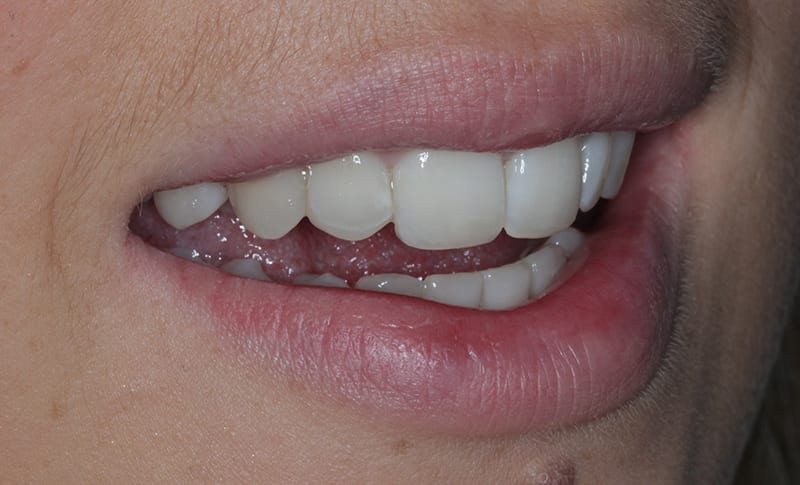 Post treatment side view
 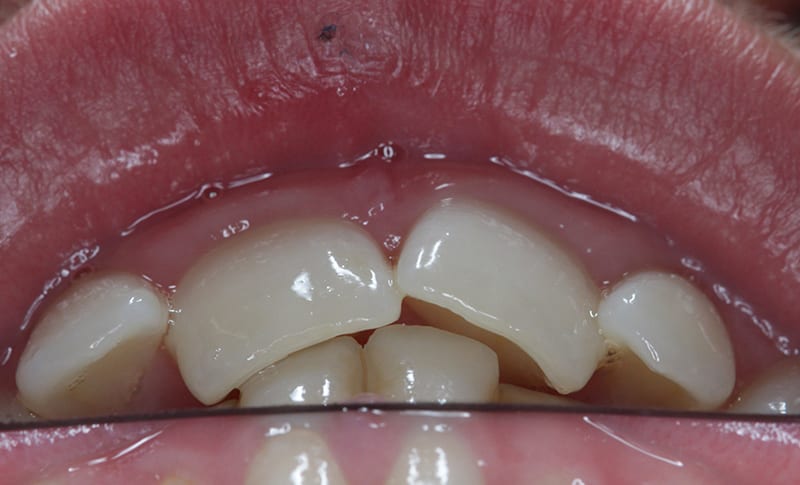 Pre treatment chin up view
 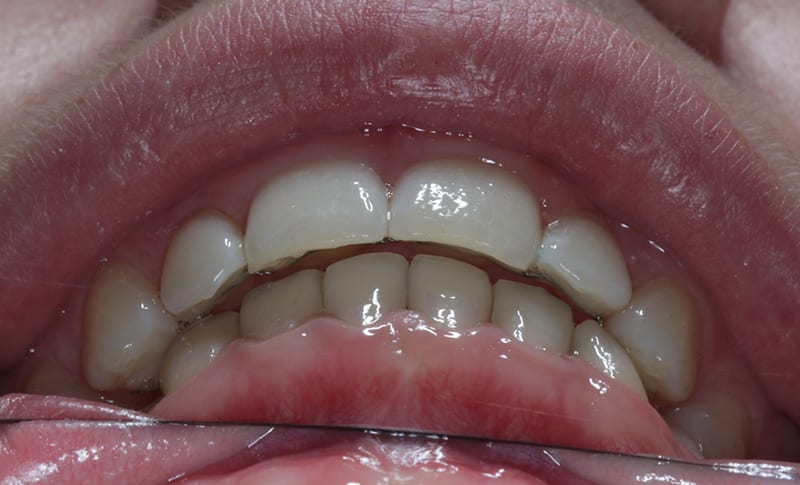 Post treatment chin up view