Minimally Invasive Preparation Treatment

Treatment carried out by Alina Lazar

Dr Alina Lazar has been practising dentistry since 1994 and founded ‘Praxis Dr. Alina Lazar’ in Germany in 2001. She completed further qualifications to become a Specialist in Aesthetic Dentistry in 2012 and a certified provider of the IAS Inman Aligner in 2013. Alina also completed the IAS Advanced training course in 2014 to develop her knowledge and skills in anterior alignment. In 2017, Alina became a certificated member of the European Society of Cosmetic Dentistry and the German Chairperson, as well as a ClearSmile Inman Aligner Clinical Instructor.
Anodontia is a genetic or congenital (hereditary) absence of one or several temporary or permanent teeth. The upper lateral incisors are among the teeth that are most often congenitally missing.
The present case report describes the treatment of a 26-year-old female patient with congenital agenesis of the maxillary lateral incisors. The patient also presented with a maxillary midline deviation and inclination of the occlusal plane in the anterior region. She came to me by recommendation from her mother to improve her smile – her mother attended my practice with the same anomaly.
The goal of treatment was to create symmetry between 13 to 23, and to be able to solve this case in a minimally invasive way, preferably with non-prep veneers.
Treatment Planning
This stage of the procedure included the following:
- Orthodontic assessment, diagnosis, model analysis and Archwize™ 3D Models
- Fabrication of mock-ups and wax-ups
- ClearSmile Aligner Light
- Bleaching
- Crown lengthening
- Non-prep veneers
- Retention
After a comprehensive extra- and intra-oral examination, profile and lip analysis (Table 1), a full series of extra- and intra-oral clinical photographs were taken, as were impressions with 3M Impregum material and a bite registration. The main problems noted were the diastema between teeth 11-21, 13-11 and 23-21, as well as the axial canter on 21 and the mal-alignment of the 11-21, which were positioned vertically and slightly palatally.
The Archwize™ tool was used to determine suitability of treatment with ClearSmile Aligner Light and to estimate the mount of tooth movement that would be necessary. The laboratory also provided a 3D model of the proposed final outcome of treatment, which was very useful in managing patient expectations and achieving patient compliance throughout the treatment process.
| Measurement | Result |
|---|---|
| Skeletal | Class II |
| Lower Face Height | 55% |
| Facial Asymmetry | Normal |
| Soft Tissues | Normal |
| Overjet | 0.1mm |
| Overbite | 2.3mm |
| Crossbite | None |
| Displacement on Closure | Normal |
| Incisor Relationship | Class II, Division II |
| Canine Relationship | Full unit Class II |
| Molar relationship | Class II, Division II |
| Teeth Present | 7654321 | 134567 | 7654321 | 1234567 |
| Centrelines | Upper to lower, 1mm to the left |
| Lips | Competent |
Treatment
Following professional tooth cleaning, the first ClearSmile Aligner Light was fitted and the patient was instructed to wear it for 22 hours a day. She was shown how to place and remove the aligner, and provided with oral hygiene advice.
The anterior alignment aspect of treatment as complete in just eight weeks. Tooth 21 was properly aligned and the protrusion of teeth 11 and 21 was corrected with four aligners worn for two weeks each. Satisfactory symmetry was also achieved between teeth 13-23 and so pre-prosthetic treatment was complete.
The next stage involved crown lengthening in order to establish harmony of the gingival level across each tooth. This is key in the creation of a beautiful smile. In this case, the gingiva and papilla levels on 11 and 21 were gently remodelled.
Following the ‘ABB’ concept form the IAS Academy – ‘Align, Bleach and Bond’ – tooth whitening was performed to subtly improve the colour of the teeth from a A2 / A2.5 shade to a A1 shade. The Beautiful Smile whitening system was recommended, which uses an oxygen-releasing LED light to discolour organic dye on the teeth. Containing no hydrogen peroxide, this approach leaves the underlying dentine untouched and therefore causes no pain or discomfort to the patient.
The final phase of treatment was the fitting of the non-prep veneers, as bonding was not suitable for the amount of new structure required. These were E-max crowns used as a cut-back with the individual layering technique. It was not necessary for the restorations to be more than 0.3-0.5mm thick, which enabled us to preserve maximum natural tissue.
Outcome
After anterior alignment, bleaching and non-prep veneers finishing treatments, the process was complete – both the patient and the clinical team were very happy with the final results.
Ultimately, incorporating smile design is important to the ethos of my practice. Although finishing with composite contouring or veneers depends on the individual case, the most important element is to work as minimally invasively as the case allows. Indeed, I have found that when the above mentioned steps are carried out in the same way as this particular case, a very satisfying result can be achieved.
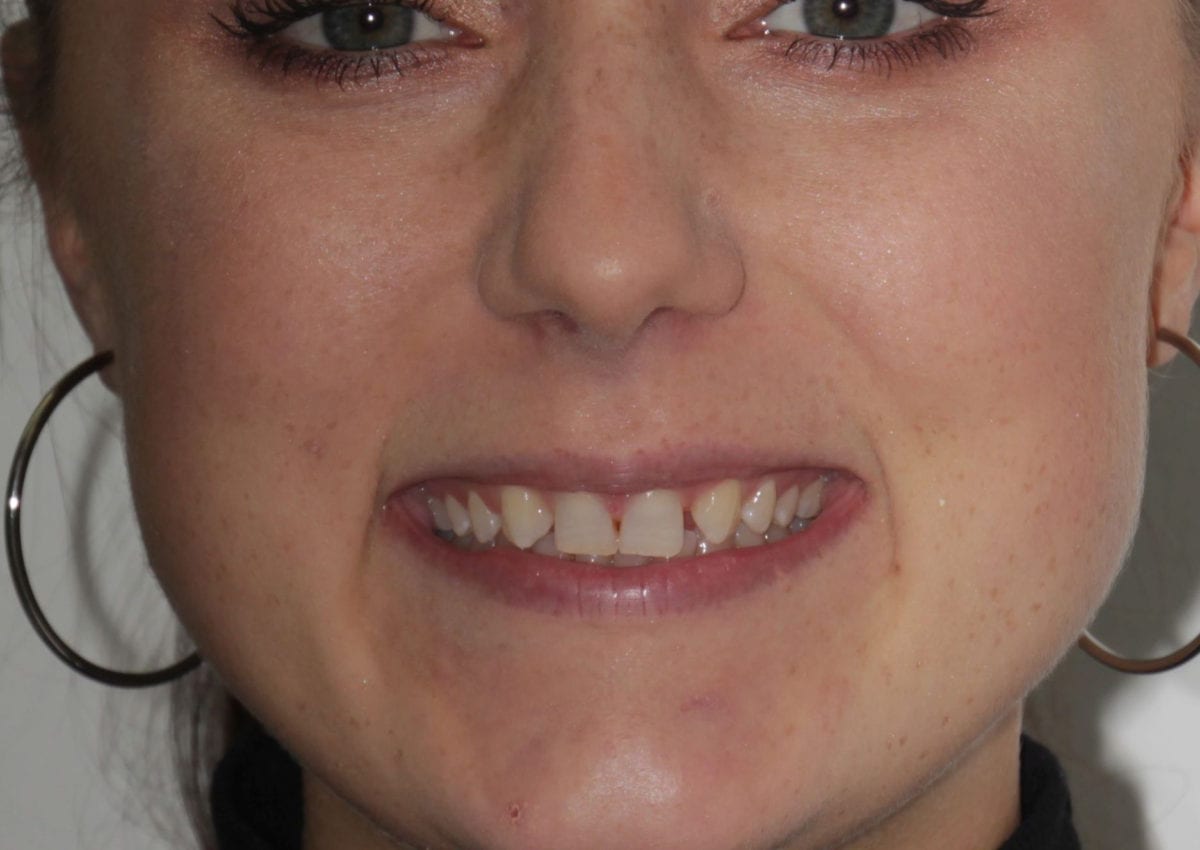 Pre treatment
 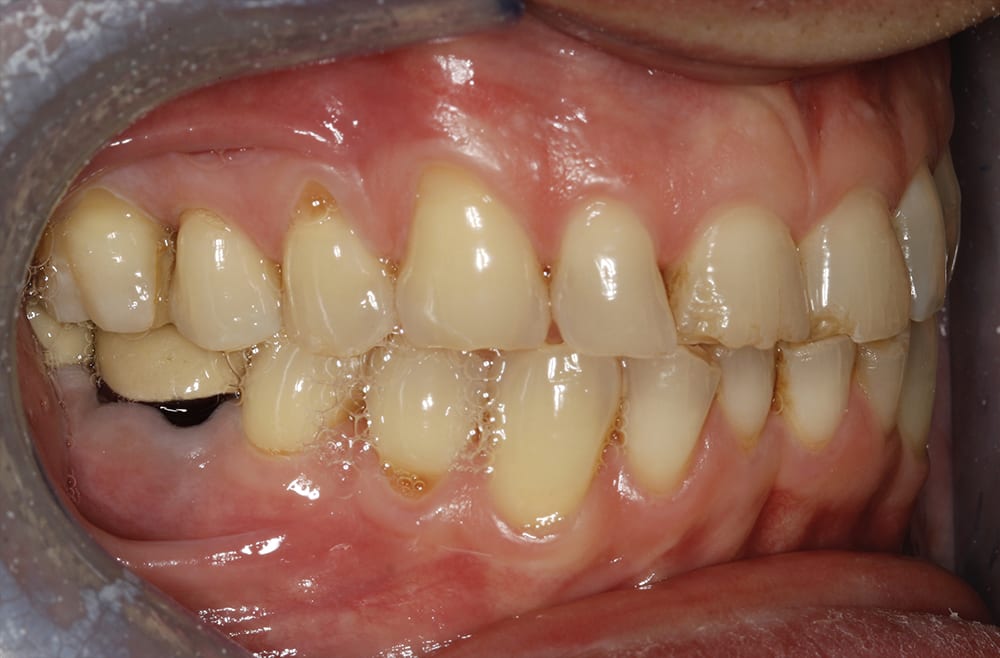 Pre treatment right lateral
 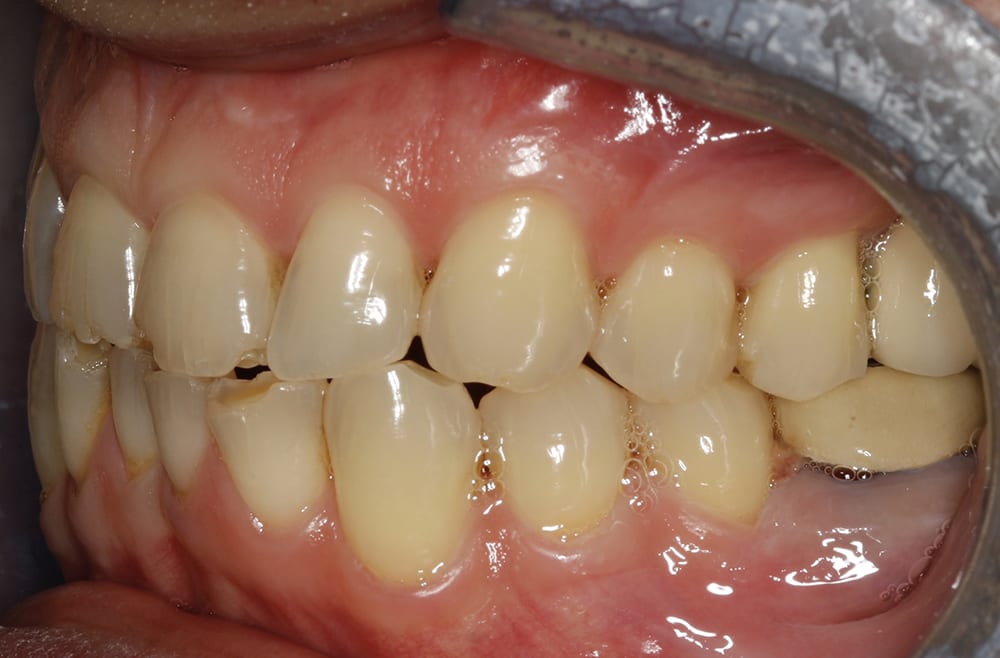 Pre treatment left lateral
 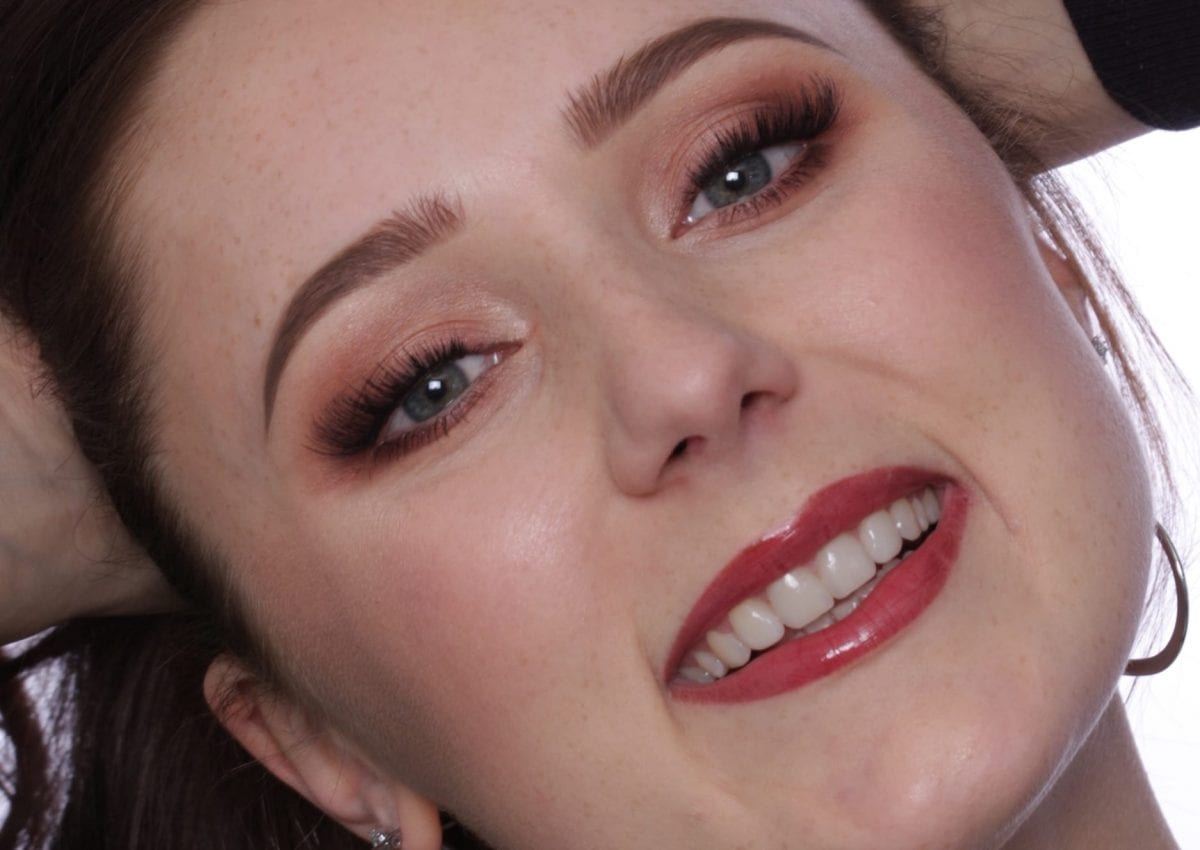 Post treatment
 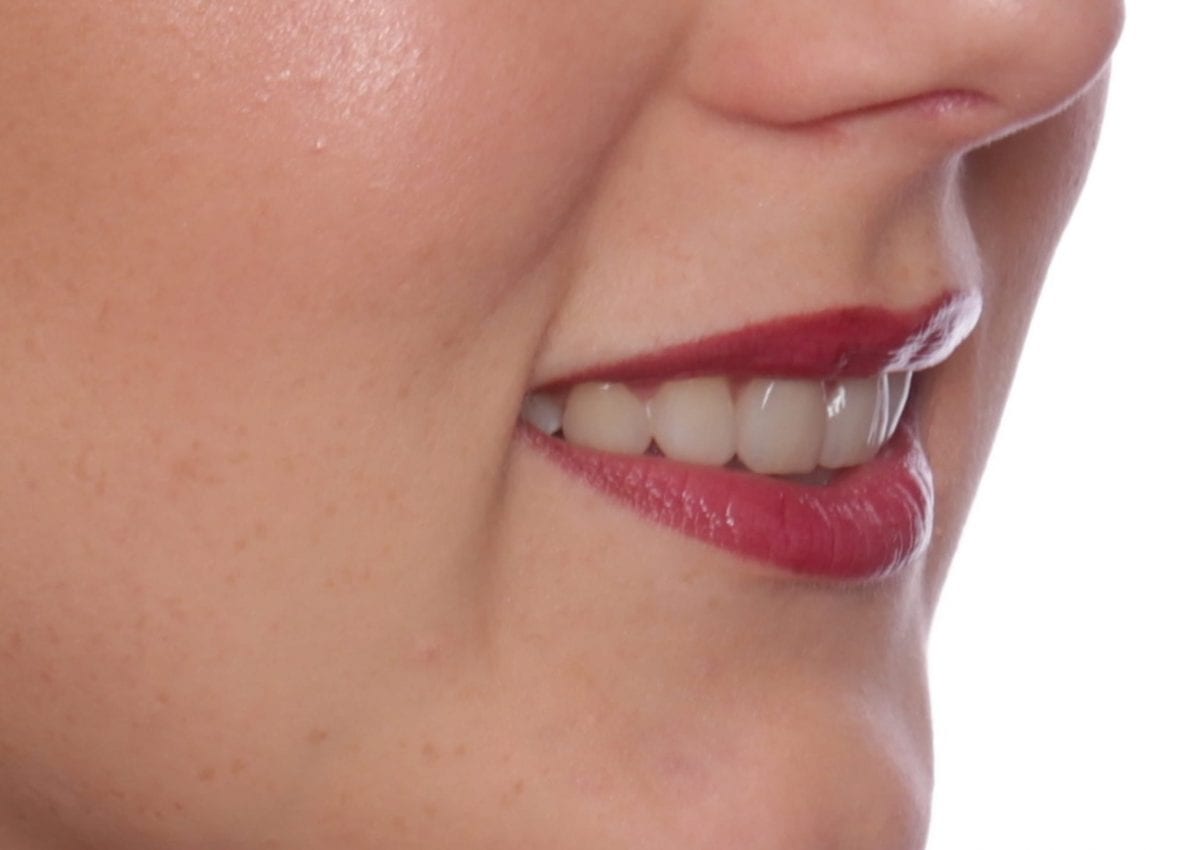 Post treatment right lateral
 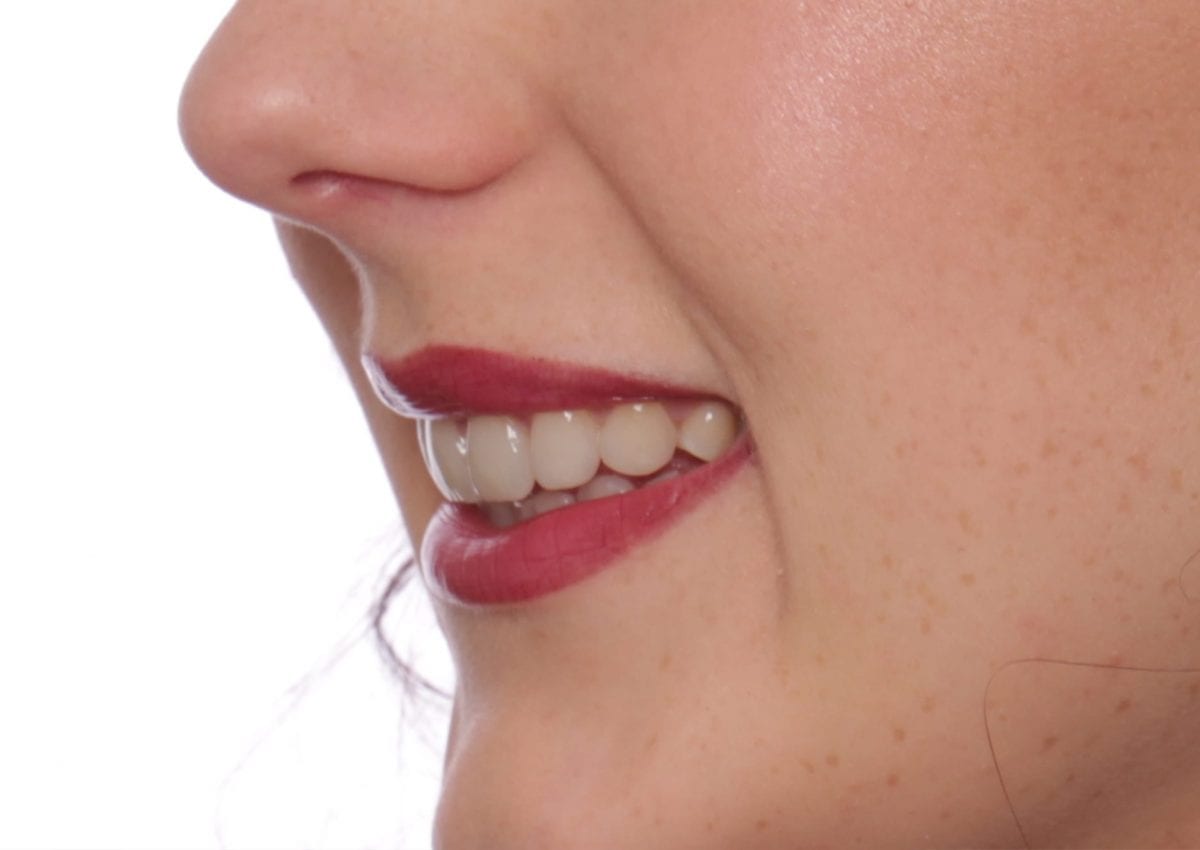 Post treatment left lateral
 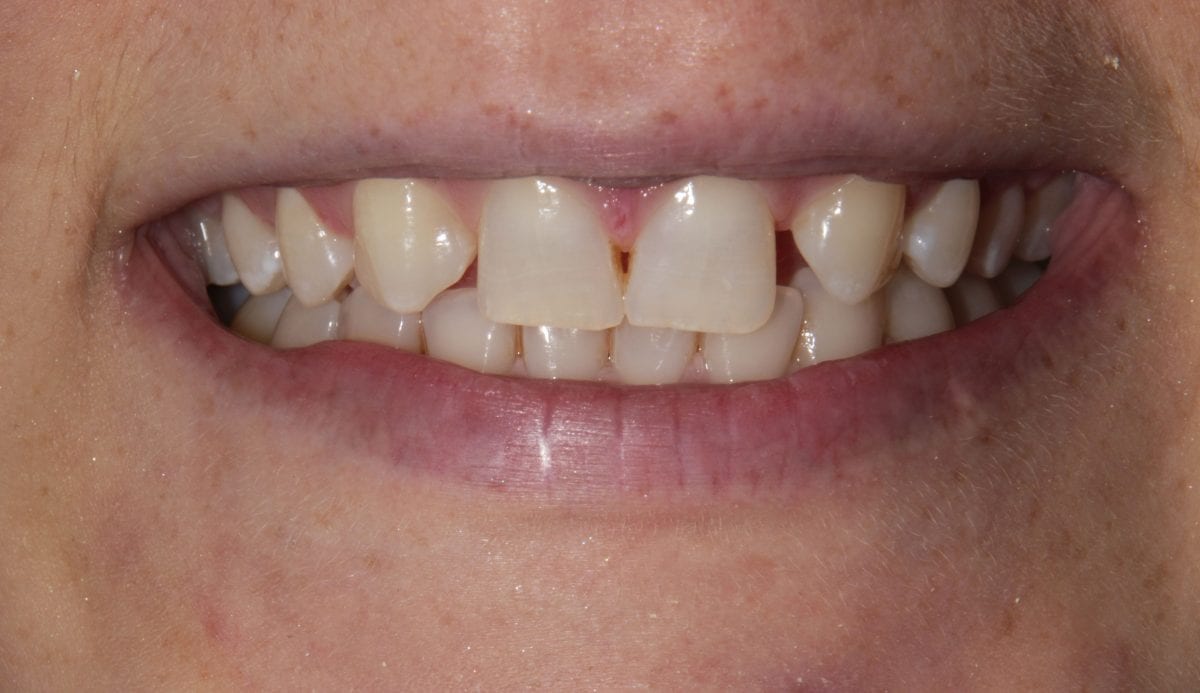 Pre treatment anrerior
 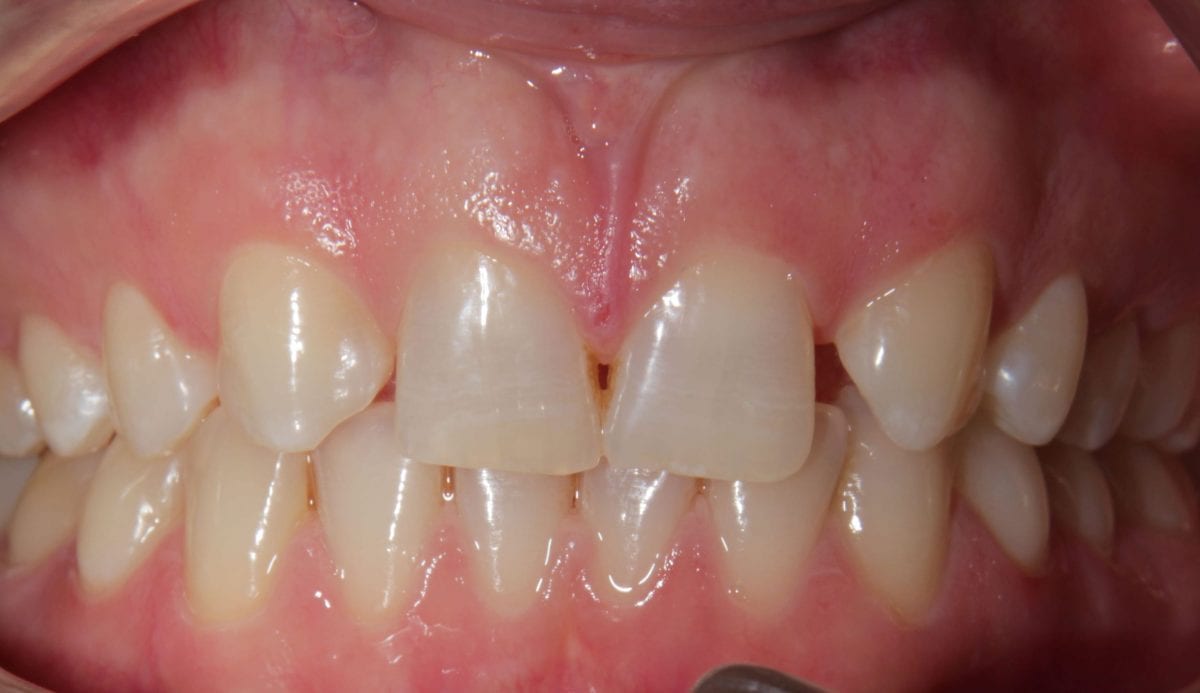 Pre treatment anterior retracted
 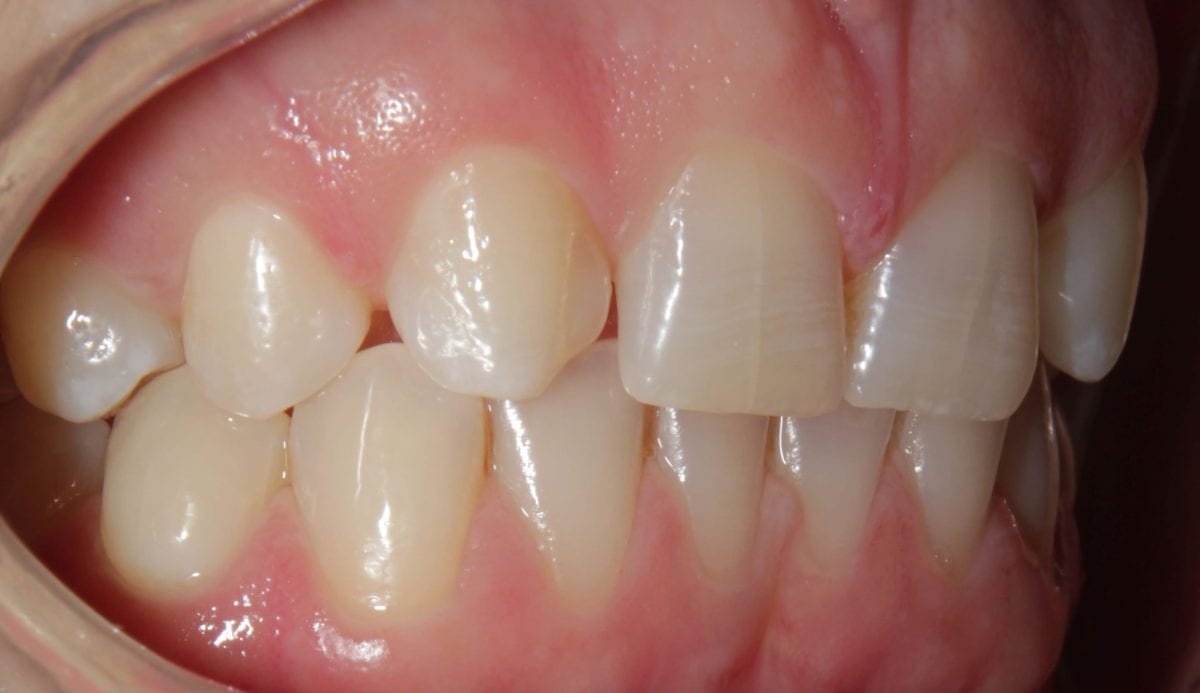 Pre treatment right lateral retracted
 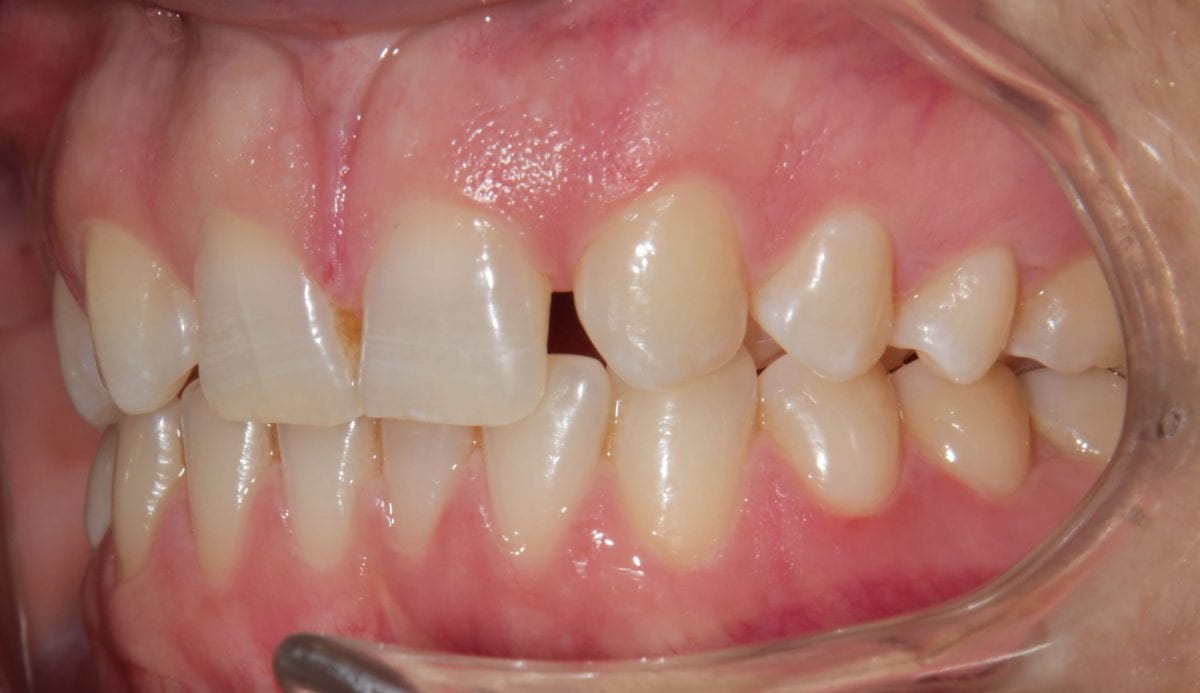 Pre treatment left lateral retracted
 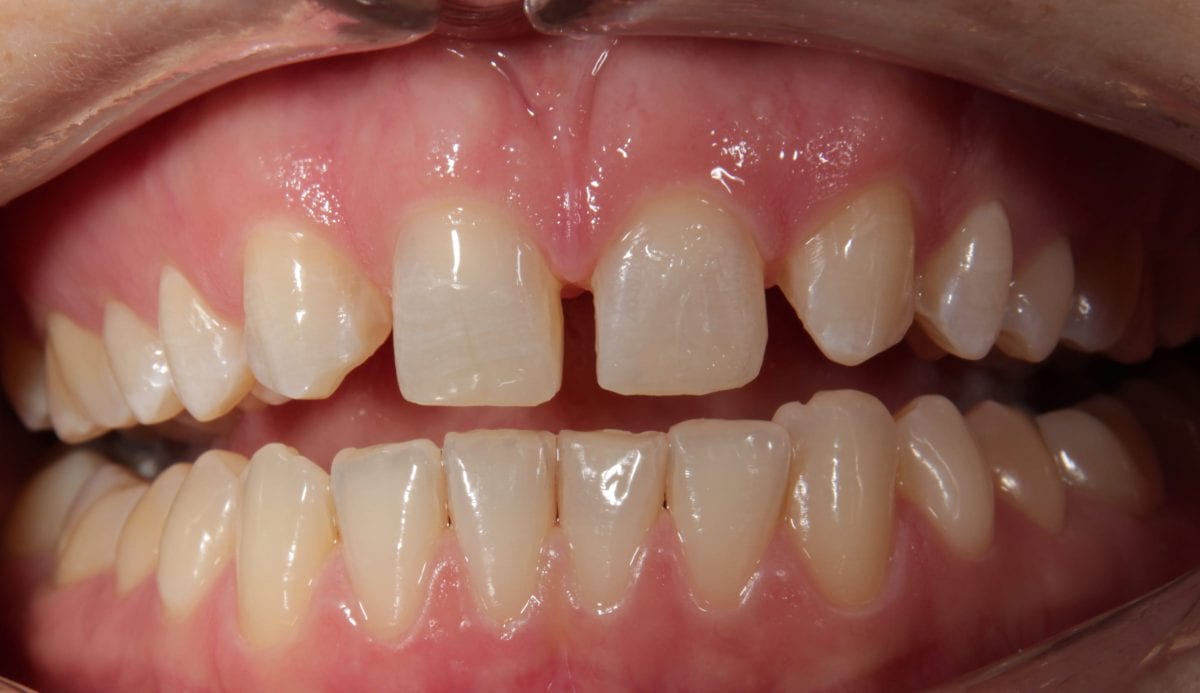 Post alignement and minimal prep
 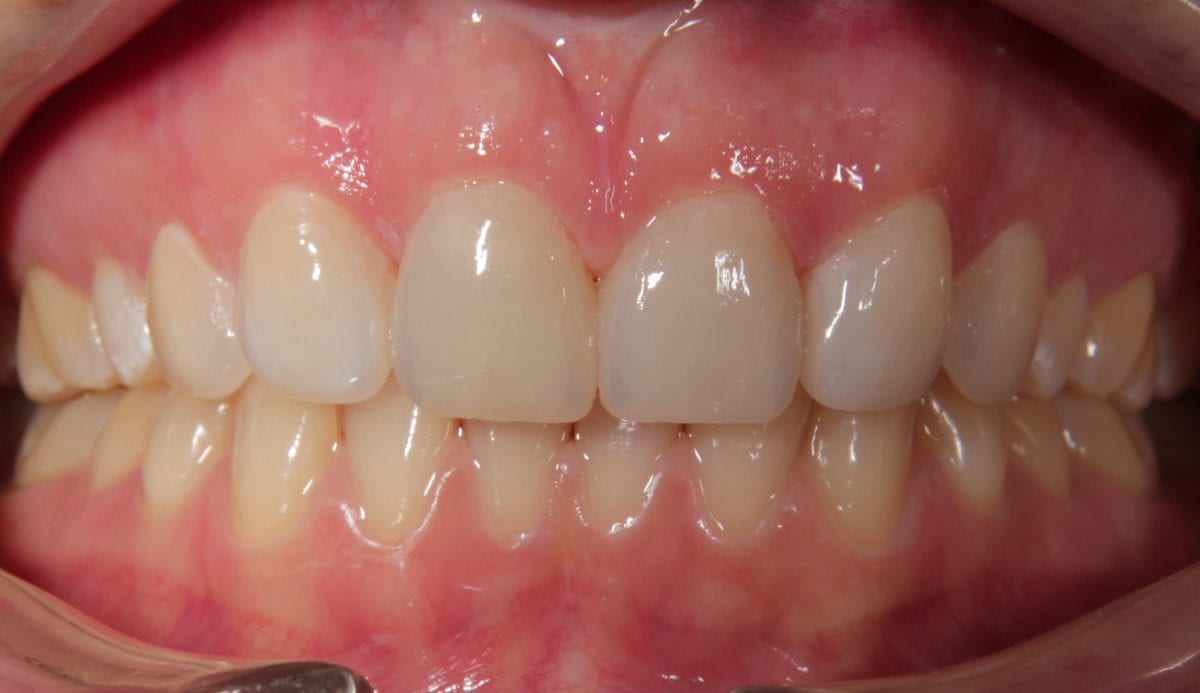 Post treatment anterior
