Getting Started in GDP Orthodontics – Finding the Right Pathway

Treatment carried out by Emma Dougherty
Dr Emma Dougherty from Bachelors Walk Dental Practice Lisburn, Northern Ireland describes her journey from starting out as a GDP in orthodontics. She has written up a case treated using the ClearSmile Brace, a fixed orthodontics option with the IAS academy…
CONTACT INFORMATION
Bachelors Walk
39 Bachelors Walk
Lisburn
BT28 1XN
Tel:028 9267 0255
Visit website
I started my journey with the IAS Academy over 5 years ago thanks to a very helpful principal who encouraged me in the right direction. I was going to take a short-term orthodontic course with another company when he advised me about the emphasis on diagnosis and treatment planning in the IAS Academy. I thought that if I’m going to start performing some orthodontics in my practices, I needed to learn the correct principles from the beginning.
I’m so grateful to Andrew Wallace for guiding me as I can’t believe how many people I’ve met on the various courses who have been using other systems and have had to re-learn the correct principles. Some of those I met on the IAS Advanced course feel like they have been treating patients for years without fully understanding the correct principles in diagnosis and treatment planning, and they’re really quite angry with some of the other systems for not teaching this at an early stage.
The first course I took was the ClearSmile Inman Aligner. It was all I felt ready for at this stage. I liked the fact that we could post photos on a forum and seek advice on whether to proceed at each stage of treatment. Six months later I went on the ClearSmile Aligner course as I wanted to offer another orthodontic option to my patients. At this stage had been bitten by the ortho bug so I decided to enrol on the ClearSmile Brace course as well.
If I were to describe the appliances from IAS Academy as a tree, the ClearSmile Brace (CSB) would form the trunk of my treatment. It is the most commonly used appliance on my patients now and I found my case uptake rate increased dramatically moving on from just treating patents with the ClearSmile Inman Aligner. Initially, I saw this course as another string on my bow, but it has been a game changer for me.
Dr Anoop Maini is one of the most inspiring speakers I have ever come across – I have a lot to thank him for. All the forum mentors are amazing individuals. They dedicate hours of their time each day, giving dentists positive feedback and advice on their cases at each stage. Your hand is held throughout treatment, which is very reassuring in your first few cases. Posting photos and assessments on the forum to acquire approval before proceeding is an excellent idea, as the traffic light system of case approval makes sure you don’t take a case on that is outside of your capability.
Having completed a number of cases, I decided to get fully accredited. I had to submit five case studies for Professor Hobson to examine and score. I will describe one of my cases below.
Case Presentation
A patient in her early 20s presented to the practice complaining of a protruding upper left central incisor and increasing crowding of her lower incisors. She also expressed concern about a chip on UL1 from contact with a glass bottle, as well as upper anterior erosion following a history of bulimia.
In addition to the initial assessment, the patient underwent a course of treatment with the dental hygienist and received advice on the appropriate use of techniques and adjuncts to maintain good oral hygiene.
Clinical Examination
On examination, periodontal pockets were all less than 3mm and no carious lesions were noted. Extraoral examination revealed an increased Frankfort-mandibular plane angle and the patient had a high lower face height. The patient was unable to achieve a consistent, lips-together rest posture and had a high lip line. Her naso-labial angle was normal.
The incisor relationship was Class I with a 4mm overjet and a 10 per cent overbite. A crossbite was present between UR7 and LR6. It was further noted that the upper arch deviated to the left by 1mm. The centre line relationship of the lower arch, however, was coincident and there was no displacement on closure.
The patient had a full Class II molar relationship on the right-hand side and a Class I molar relationship on the left. The canine relationship on both sides was a Class I. The lower arch was moderately crowded with mild crowding on the upper arch.
Treatment Plan
To treat the patient’s overjet and overbite, while also correcting the right molar relationship, centre lines, crossbite and upper and lower anterior crowding, a number of different treatment options were discussed.
The ideal or comprehensive approach was discussed in detail with the outcome of correcting her overjet and overbite to a normal Class I relationship, as well as the right molar relationship, posterior crossbite and centrelines, along with the upper and lower anterior crowding.
A compromised treatment plan was also discussed as an option, highlighting that while this would correct her upper and lower anterior crowding (which were her presenting concerns), we would be accepting her posterior crossbite, centrelines and right molar relationship. I feel this discussion is the most important part of the treatment process and it was aided by the use of Archwize™ 3D planning, with before and after mock-ups of the anterior alignment. It was here that I demonstrated exactly what would be corrected and what would be accepted unless a comprehensive approach was undertaken. In this case the patient could visualise her posterior crossbite, centrelines and molar relationship. I also highlighted the shallow overbite and the risk of it reducing, given the risk factors of an increased FMPA and high lip line.
The patient opted for anterior alignment using the ClearSmile Brace appliance with ceramic brackets on the upper and lower teeth. Interproximal reduction (IPR) estimated by the Archwize™ diagnostic would be used to aid alignment.
Treatment Process
Once consent had been provided and prospective outcomes had been discussed in detail with the patient, treatment commenced with the bonding of the appliance to both upper and lower arches using 0.012-coated NiTi wires and elastic doughnut-shaped rings. Figure eight elastic ties were also placed on the premolars to increase friction and reduce flare. During the same appointment, IPR was carried out on upper 3-3 and lower 5-5, with composite anchors distillate the molar tubes placed to prevent travel and further reduce flare. Shortly after, disking of LR3, LR4 and LR5 was performed to create space for anterior alignment, reduce flare and minimise the risk of developing an anterior open bite.
At the next appointment, the wires on the upper arch were replaced with larger 0.016 NiTi wires. Quick ties were placed in the lower arch to aid derotation
and alignment, and further upper and lower IPR was performed.
Just under half way through the treatment process, good progress had been achieved in the lower arch so the upper wires were changed to 20×20 and lower arch wires to 0.016. There was no change in overbite at this point and a powerchain was required on upper 2-2 to assist with closing the midline diastema.
After a short time, the diastema between the upper centrals was closed, though LL2 and LR2 appeared slightly buccal. To counteract, further IPR was performed and another powerchain was placed on upper 3-3. As more time passed, positioning of LL2 and LR2 began to improve despite being buccal in appearance, and LL3 had rotated lingually. To facilitate further progress, LL3 was tied to LR2 with a long ligature tie and a short ligature tie was used on LR3.
In the end stages of treatment there were improvements to the position of LR2 and LL2, but they weren’t as perfectly aligned as I would have liked. IAS ClearSmile Aligners were therefore offered to complete alignment, but the patient was happy with the result achieved so far and declined further treatment. A fixed retainer was bonded to both the upper and lower arches. Tooth whitening was then undertaken at home following composite edge bonding on the worn teeth.
Outcome
Altogether, this was a difficult case – not least because of the patient’s high Frankfort-mandibular plane angle, increased lower face height and high lip line. Together, these factors increased the risk of developing incisor flare and an anterior open bite.
Having learnt a few valuable techniques from IAS Academy’s online mentoring at each stage, I was able to maintain a slight overbite and an anterior open bite was avoided for this patient. That being said, the upper incisors have flared post treatment, which has suggested that maybe the case could have been improved with lower premolar extractions if the patient had opted for a comprehensive approach.
On reflection, I would have liked to bond the upper laterals and canines to give a more symmetrical result, but the patient opted against this. Ultimately, however, both the patient and I were happy with the outcome.
 Pre treatment
  Post treatment
 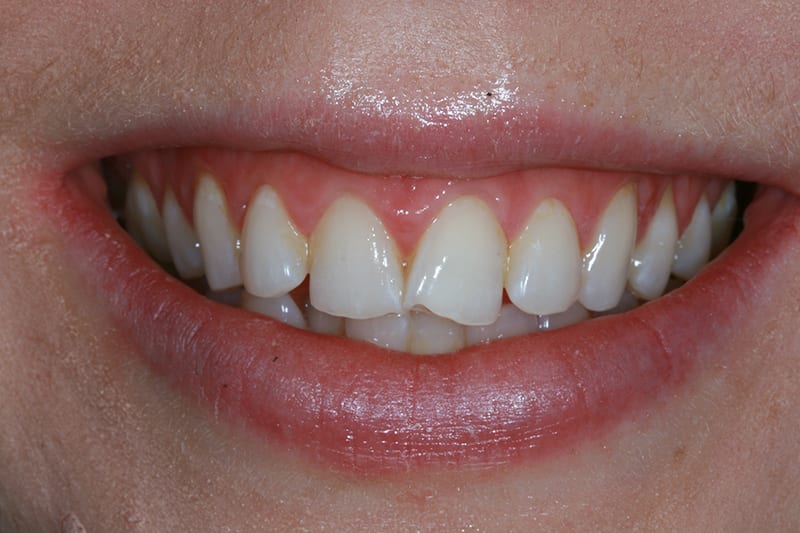 Pre treatment smile
 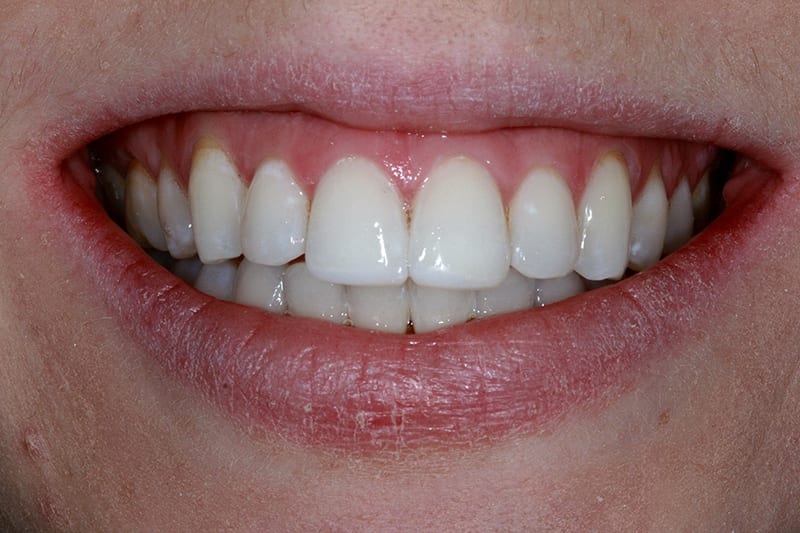 Post treatment smile
 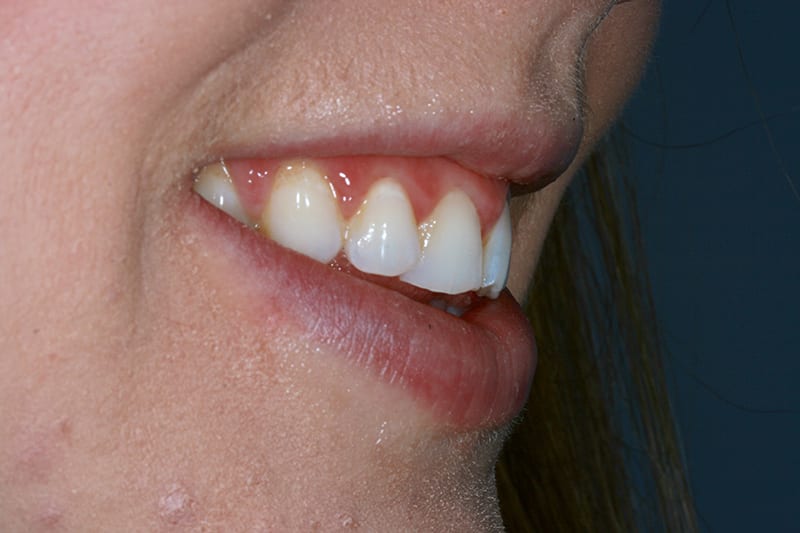 Pre treatment right lateral
 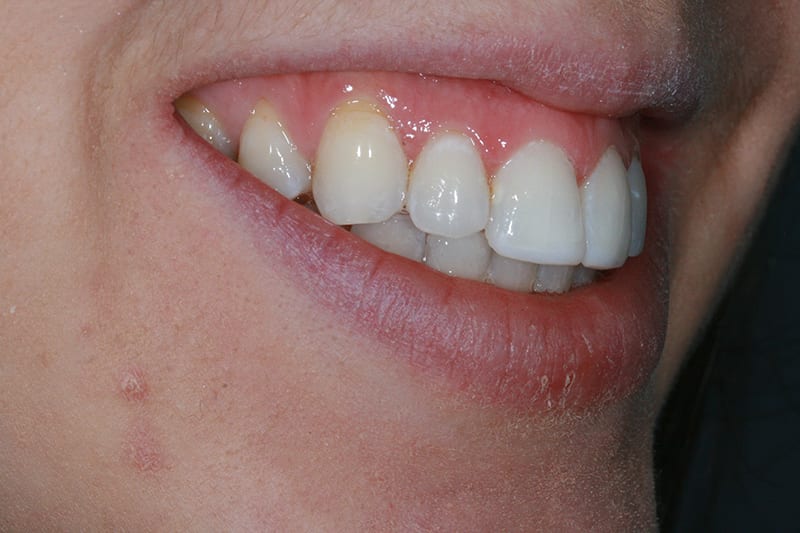 Post treatment right lateral
 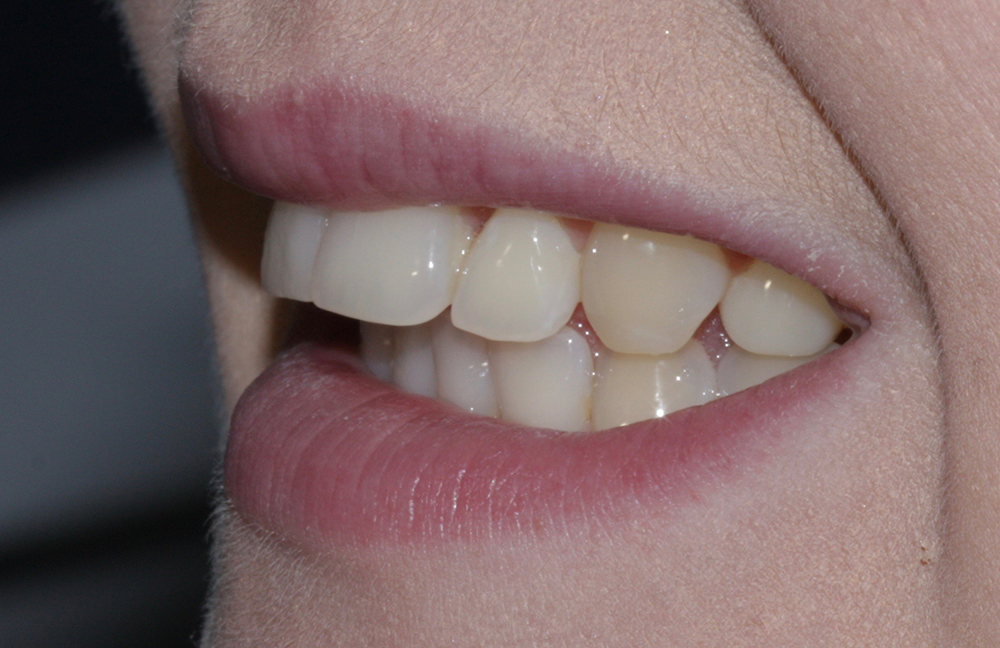 Pre treatment left lateral
 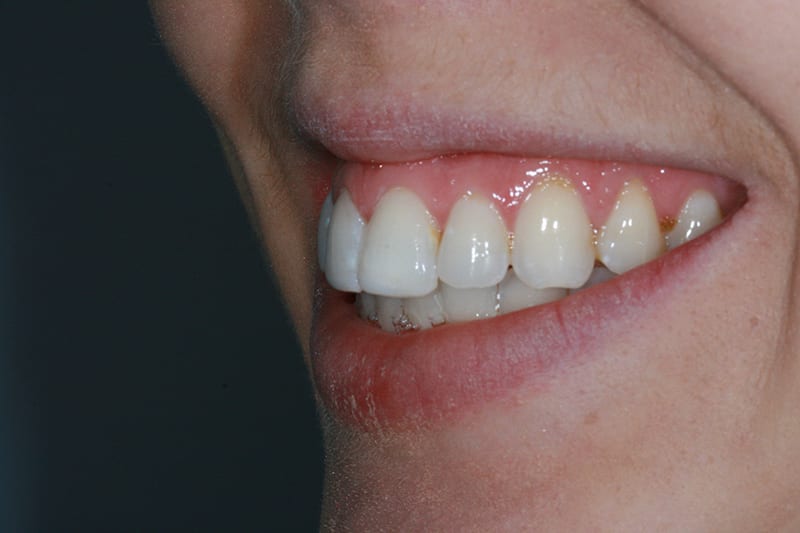 Post treatment left lateral
 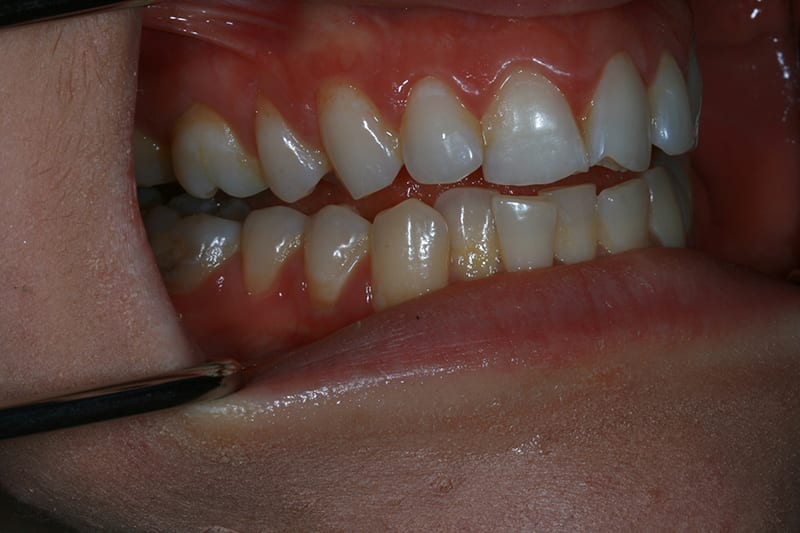 Pre treatment retracted right lateral
 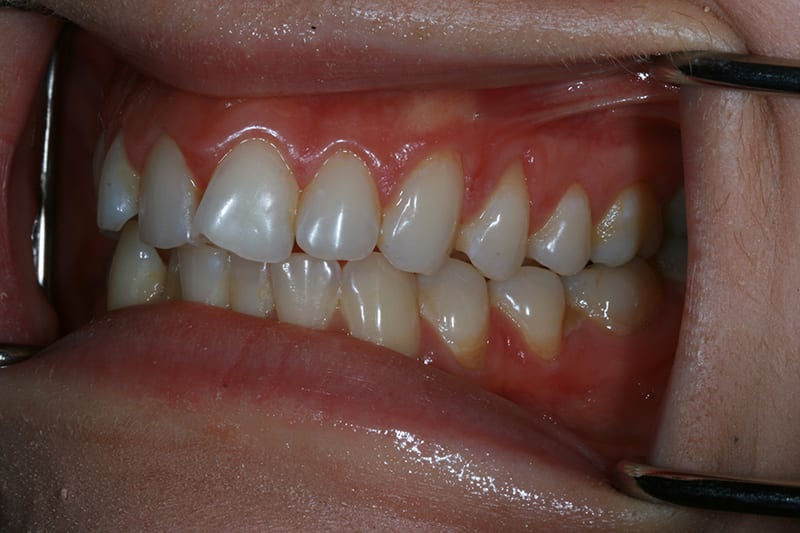 Pre treatment retracted left lateral
 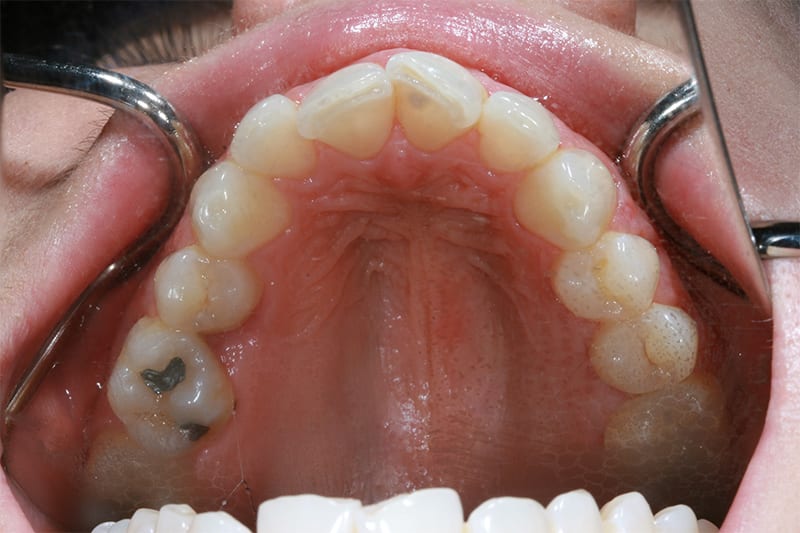 Pre treatment upper occlusal
 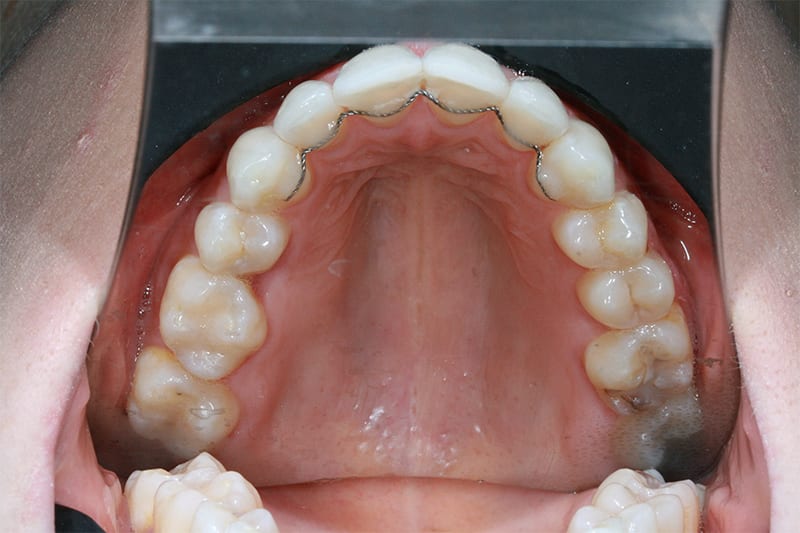 Post treatment upper occlusal
 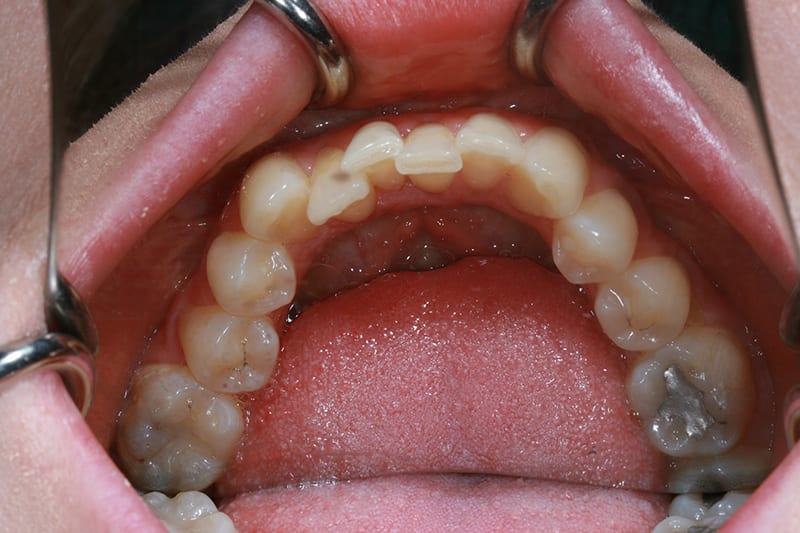 Pre treatment lower occlusal
 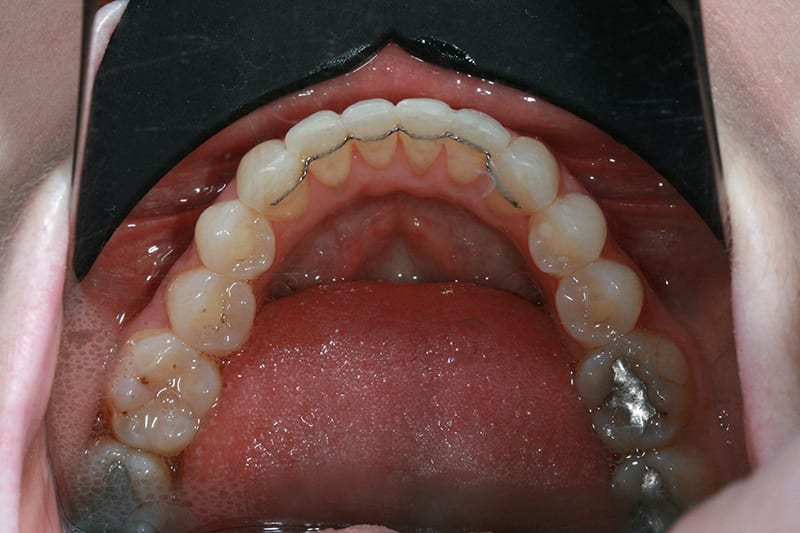 Post treatment lower occlusal
 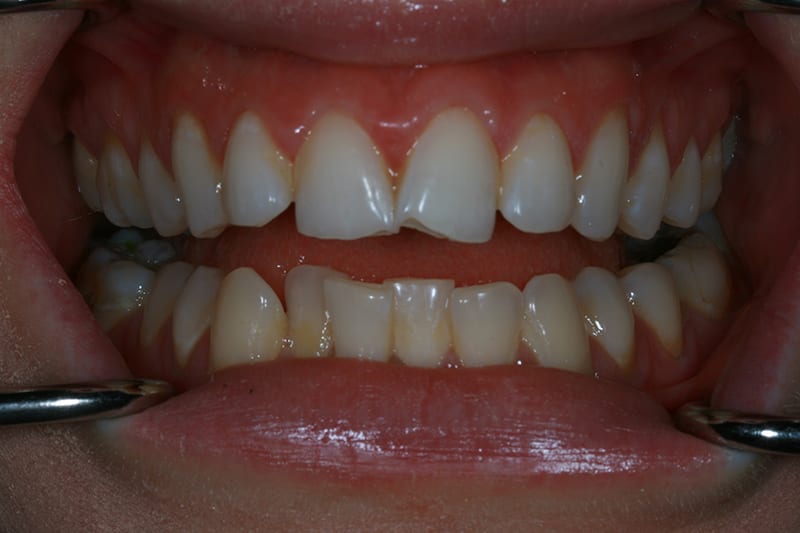 Pre treatment retracted open bite
 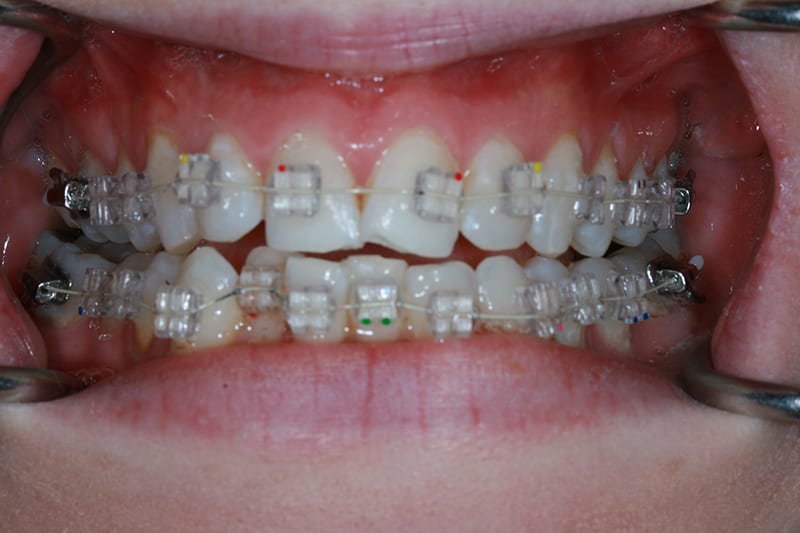 IAS Fixed upper and lower fitted
 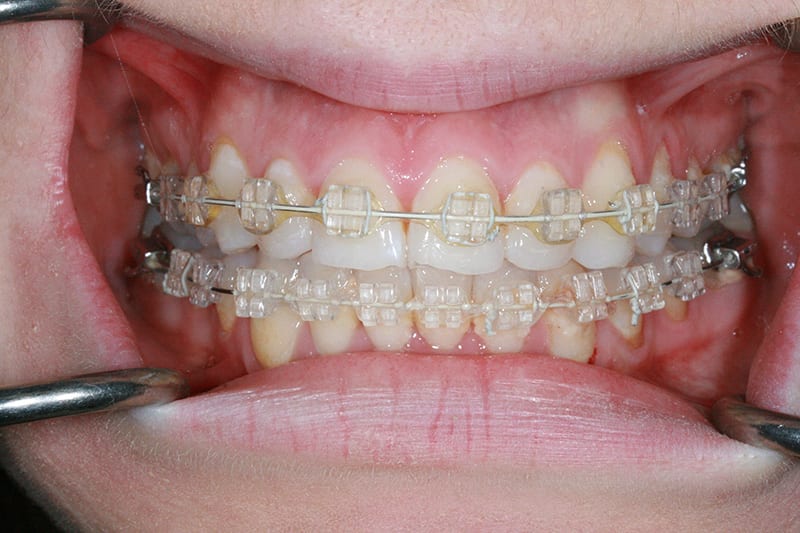 Week 20, aligment prior to deband. Upper and lower in 20_20 coated niti